Listen to the Blog Post
Choosing the right paint for different areas of the home is a common question we get from clients. While painting your house might seem simple, the reality is that there are countless options to consider.
With years of experience remodeling, building, and painting homes, we've learned what works best—and we’re here to share our expert insights with you. From selecting the best brands to finding the perfect finish and achieving a flawless application, this guide will help you make informed choices for a long-lasting, professional-quality result.
Painting Tip #1: Why the Right Paint Brand Matters
Over our 30+ years of experience working with interior paint, we have learned that not all paint brands are created equal. While it may be tempting to choose a budget-friendly option, the quality of your paint will impact not only the final look but also the durability and longevity of your walls.
Different brands have different formulas, and some simply perform better than others. Based on our experience, our favorite recommendations are Benjamin Moore, Sherwin-Williams (SW), and Farrow & Ball. These brands offer a range of finishes and quality levels, allowing you to customize your coverage based on your needs and budget.
While higher-quality paints cost more per gallon, they offer superior coverage and durability, meaning you’ll likely need fewer coats, translating into less paint material. Lower-cost water-based paint brands typically contain more water than higher-quality products, resulting in thinner, drippy applications and necessitating more paint overall.
Another benefit of working with high-quality brands is access to professionals who work for these brands who genuinely understand color, mixing, and the best options for your specific project. This expertise can make a significant difference in the quality of your painting project.
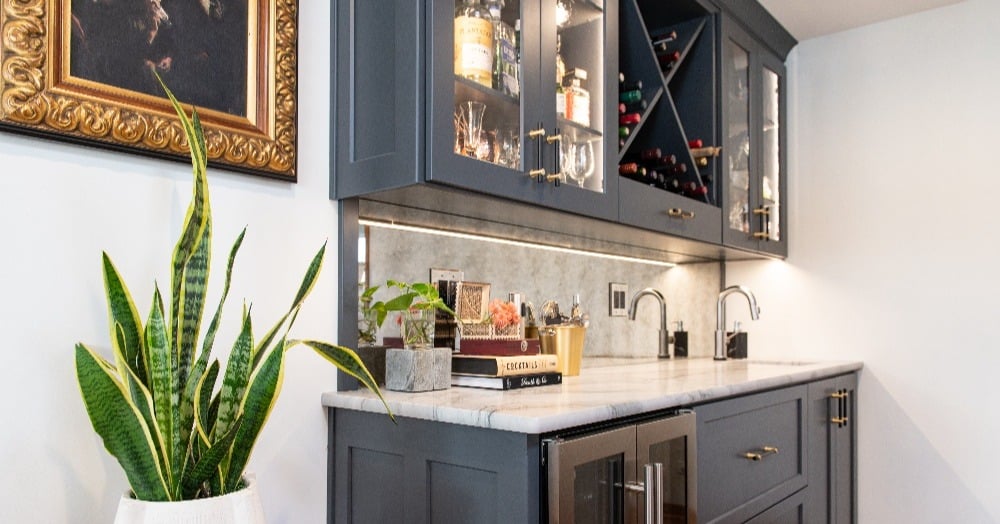
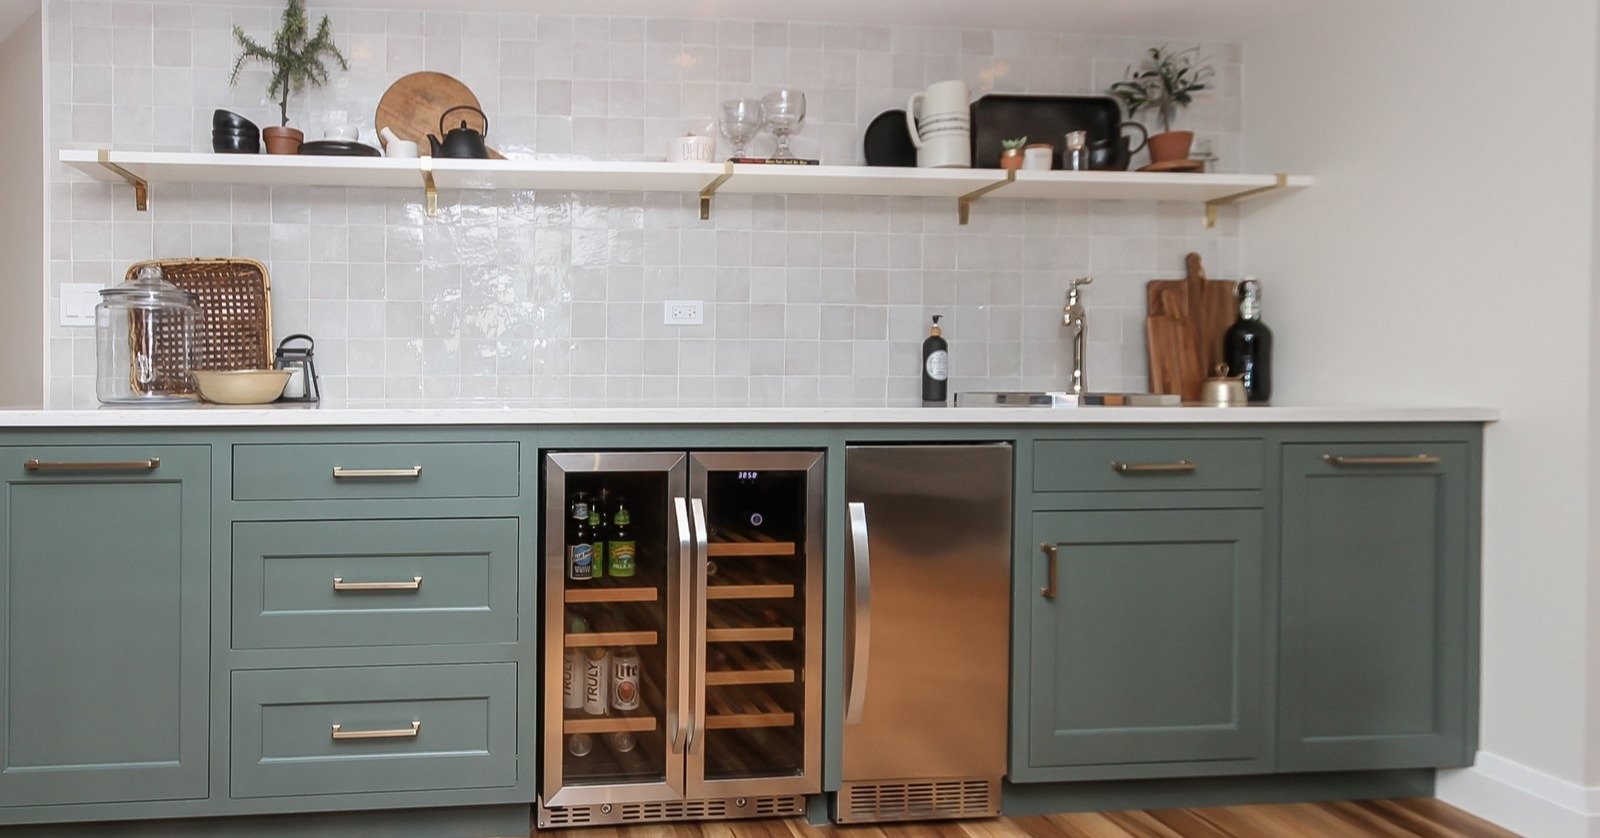
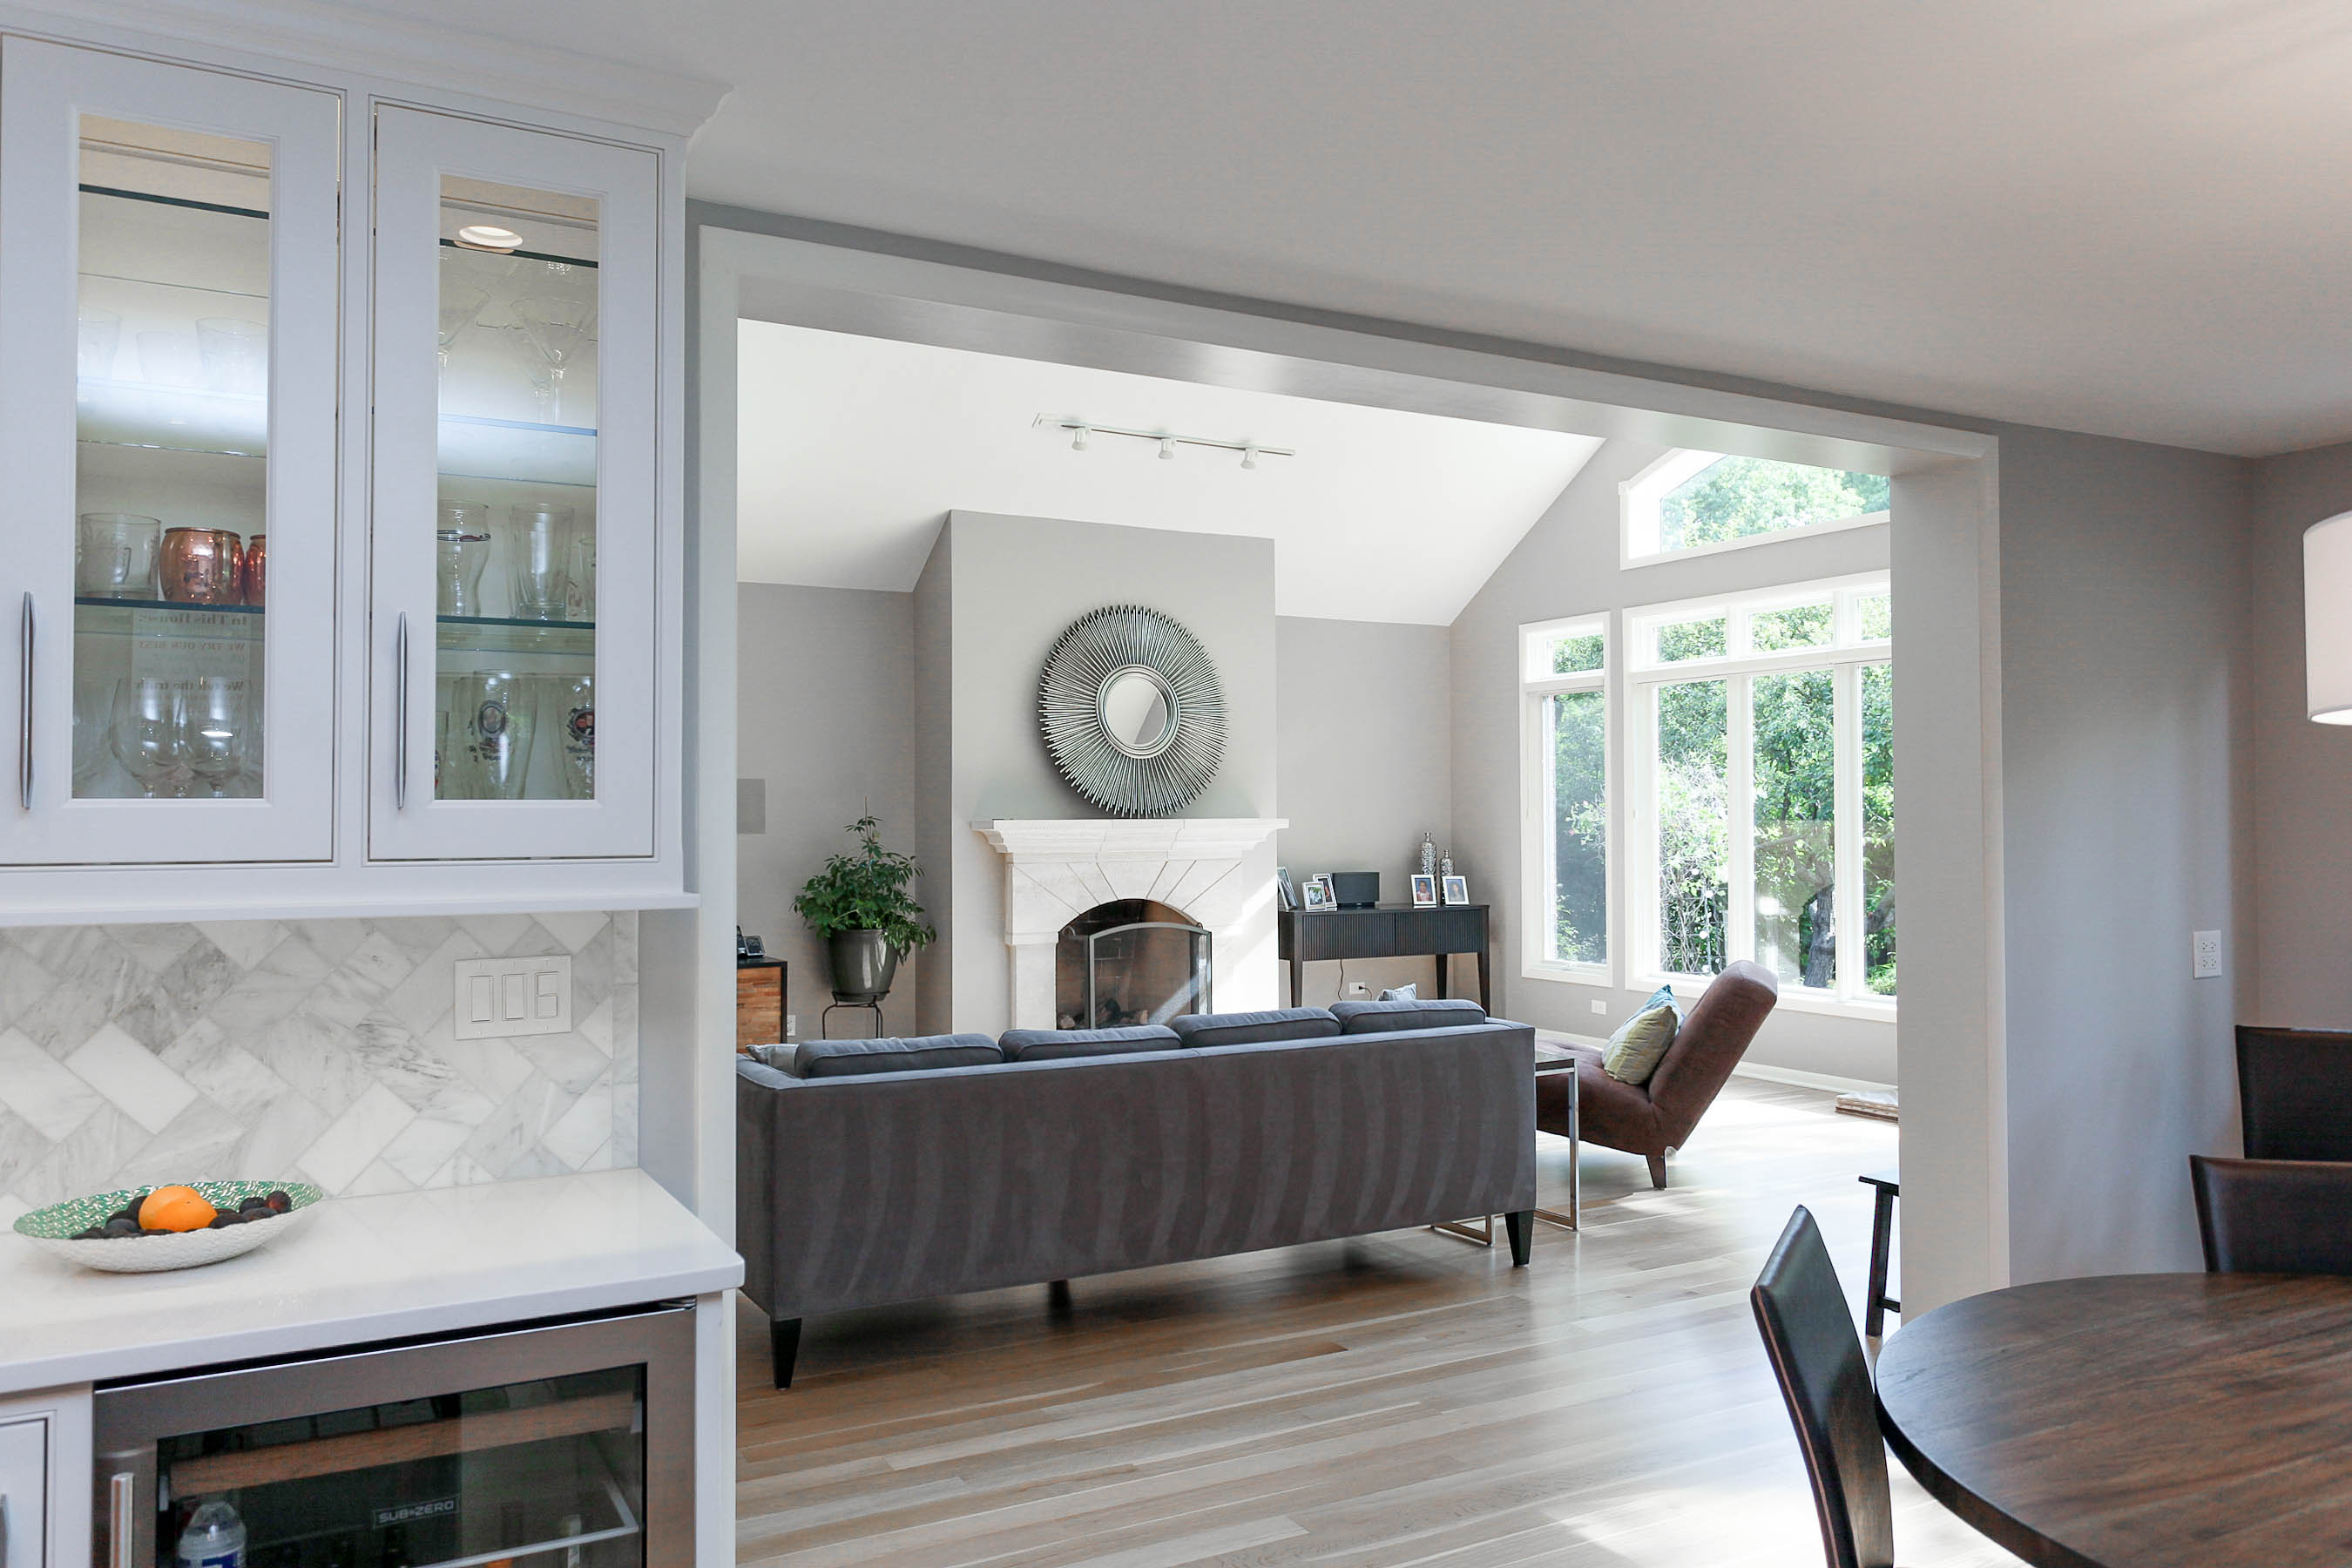
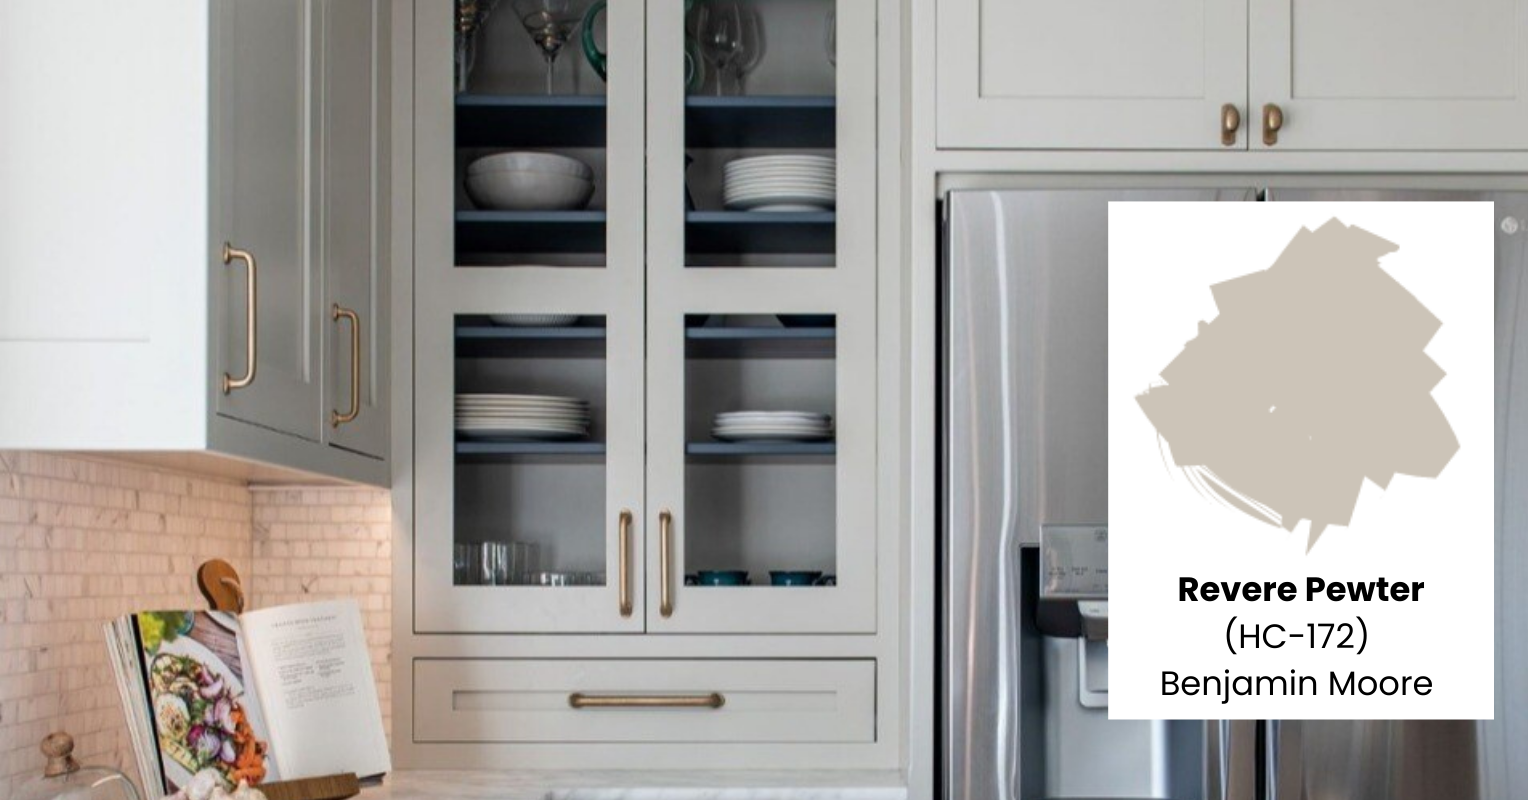
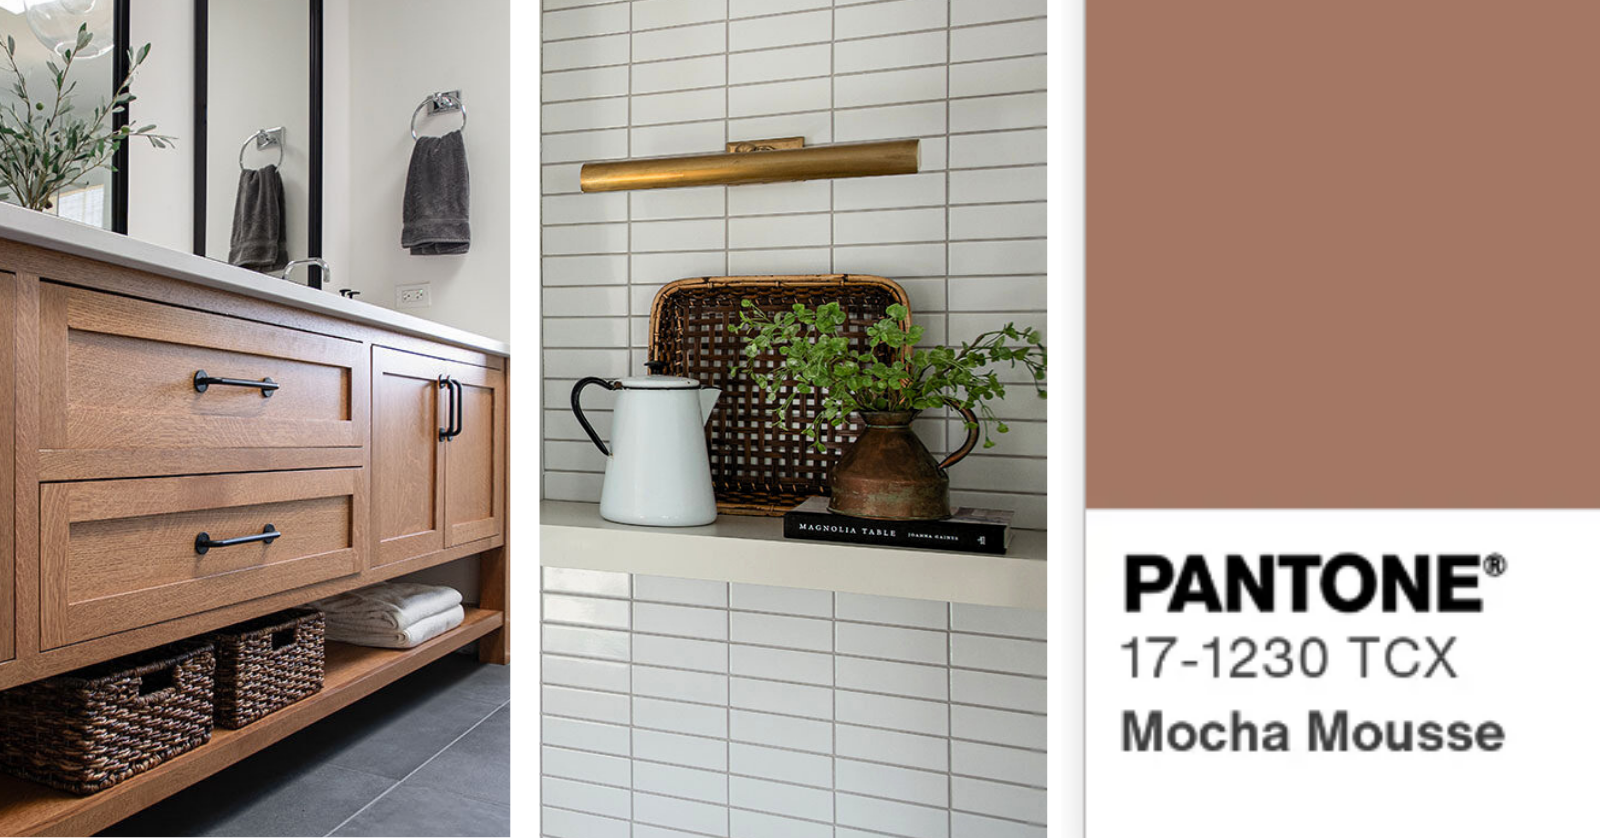
.png?width=1600&height=800&name=paint-colors-craneshollow%20(1600x800).png) The image above features cabinetry in Hale Navy and Revere Pewter by Benjamin Moore and wall color in Sea Salt by Sherwin-Williams.
The image above features cabinetry in Hale Navy and Revere Pewter by Benjamin Moore and wall color in Sea Salt by Sherwin-Williams.
Painting Tip #2: A Guide to Interior Paint Finishes & Their Uses
How do I choose the right paint finish for each room in my house? Selecting the right paint finish is just as crucial as choosing the right brand. Each finish has distinct characteristics that influence durability, ease of cleaning, and how light interacts with your walls. Choosing the right finish not only enhances the look of your space but also ensures longevity and how easy maintenance will be.
In the context of interior paint, 'sheen' describes the gloss or shine level of a dried paint finish. This factor influences how much light the surface reflects, impacting how the paint will look in your space. Glossy paints are more resilient against everyday wear, effectively resist scratches, and are easily cleaned with a damp cloth.
Trim & Doors
Because a durable finish is very important when painting trim and doors, satin or semi-gloss finishes are preferred.
- Satin Finish: This finish provides a subtle sheen and a smooth finish, offering an elegant look while improving durability and washability.
- Semi-Gloss Finish: This option is a step up from a satin finish in reflectivity. It has a higher sheen that reflects more light, enhances brightness, is more resistant to scuffs and stains, and is easier to clean.
Pro Tip: The higher the paint’s sheen, the more reflective and durable the paint will be, making it ideal for high-traffic areas or spaces that require frequent cleaning.
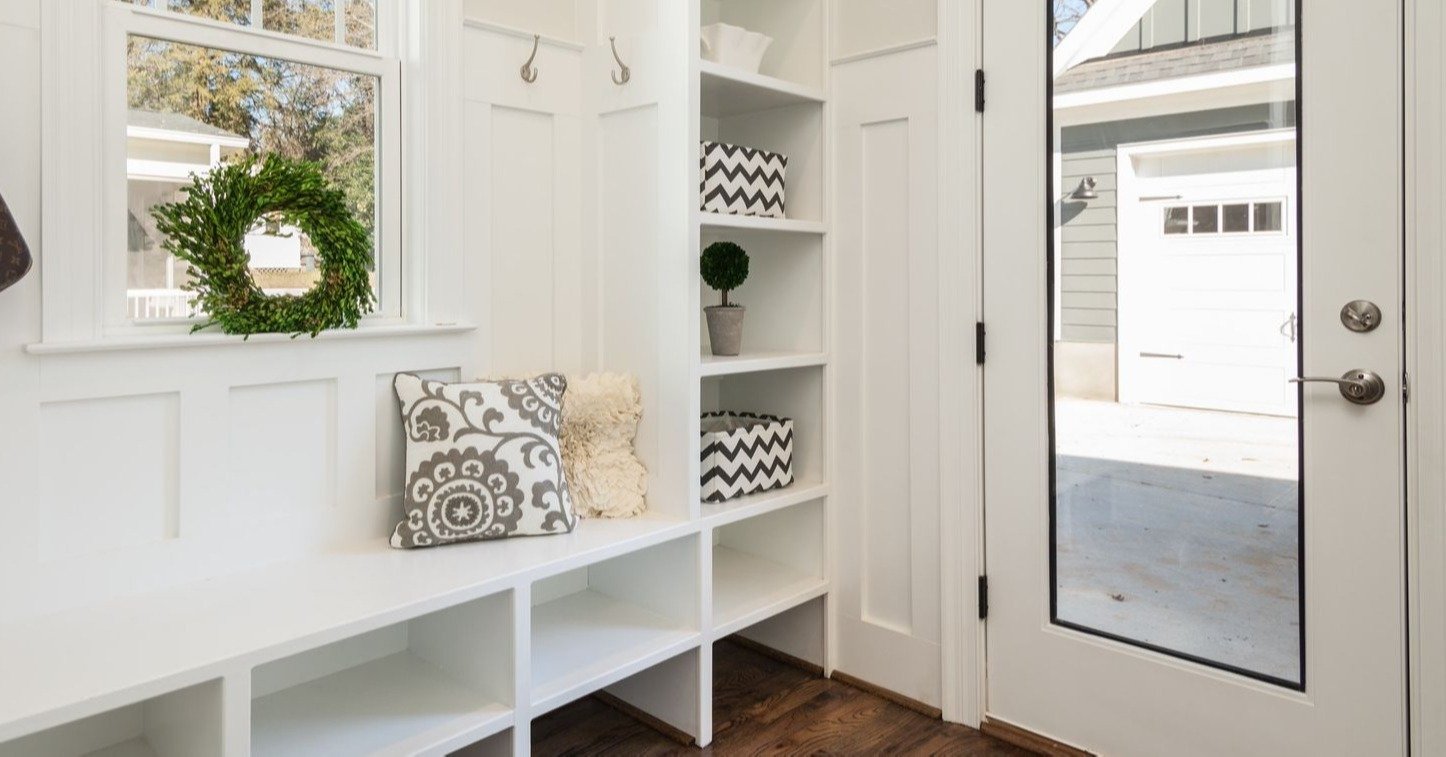
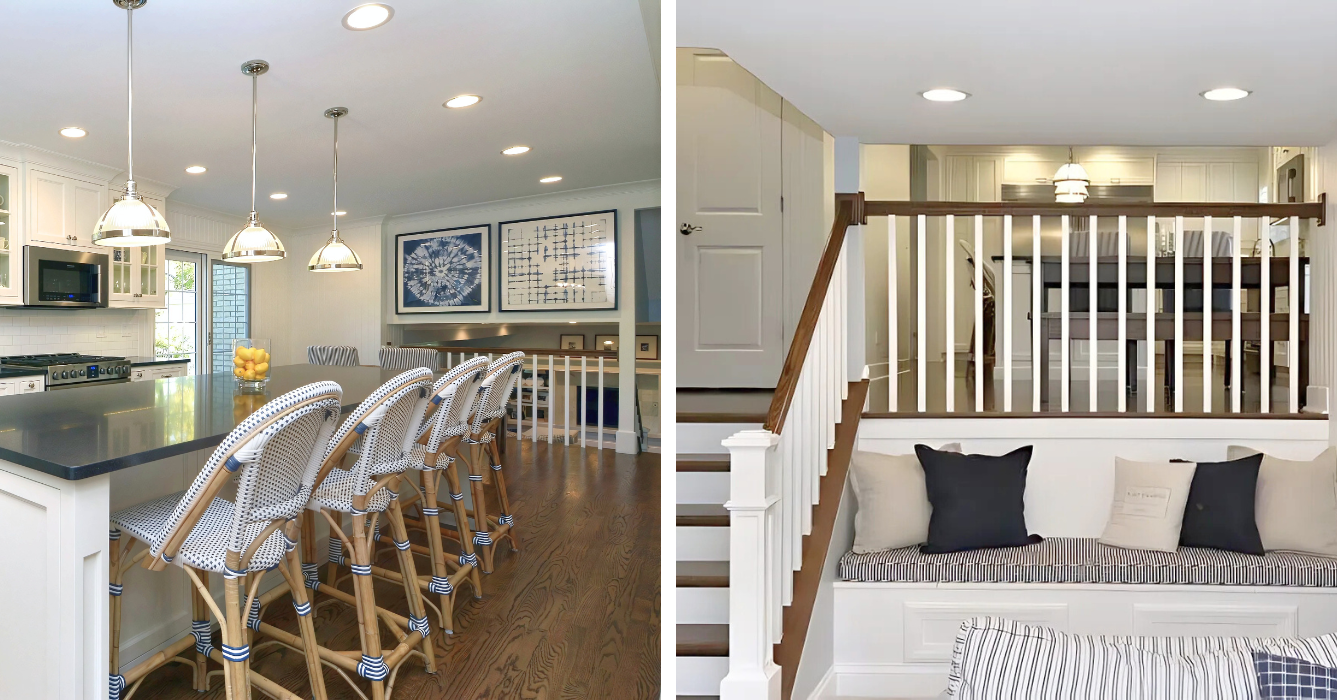
.png?width=1060&height=530&name=park-place-hallway-storage%20(1600x800).png)
Interior Walls
While there are many interior wall paint finishes to choose from, we’ve highlighted the most common finishes for painting walls, including:
- Matte/Flat: Designers tend to love matte and flat paint finishes because they are excellent at absorbing light, allowing the paint color to stand out without unwanted reflections. This creates a clean look that enhances the overall aesthetic without adding visual distractions from light reflections. Additionally, these finishes help conceal drywall imperfections, making them a popular choice for uneven or textured walls. However, these paints are challenging to maintain. These non-reflective paints are more prone to scuffs and stains and make touch-ups very difficult, often requiring an entire wall repaint to maintain a flawless appearance.
- Eggshell (also known as Satin): This was a go-to choice for years because of its balance between cleanability and durability. While it’s easier to maintain than matte, its slight reflectiveness makes drywall imperfections more noticeable. Some people also find that it reflects more light than they would like for their walls.
- Velvet: This silky finish is a perfect compromise between matte and eggshell. It offers a soft, low-reflection look. Velvet can be touched up well and cleaned decently, and it doesn’t highlight wall imperfections as much as higher-gloss finishes. Many find it calming and elegant.
%20(1)-1.png?width=837&height=251&name=paint-sheens-sw(1600x800)%20(1)-1.png) Image courtesy of Sherwin-Williams.
Image courtesy of Sherwin-Williams.
Room-Specific Paint Finish Recommendations
- Interior Paint for Bedrooms, Living Areas, and Kitchens: choose a paint color in a velvet finish for a soft, silky look or an eggshell/satin finish for a more traditional look.
- Paint For Bathrooms & High-Humidity Areas: Satin finish (choose an antimicrobial, moisture/mildew-resistant, and easier-to-clean paint like Sherwin-Williams Duration® or Benjamin Moore’s AURA Bath & Spa products).
- Painting Ceilings: Using dedicated ceiling paint, such as Sherwin-Williams CHB or Benjamin Moore Waterborne Ceiling Paint, rather than standard wall paint, offers several advantages, improving both the application process and the final result.
- Their ultra-flat finish minimizes glare and hides imperfections like drywall seams and patchwork, creating a smooth, uniform look.
- These paints are formulated to be thicker and drip-resistant to reduce mess during application, while their high pigment levels provide superior coverage with fewer coats.
- Many options also include enhanced adhesion to prevent peeling or cracking, stain-blocking properties to conceal discoloration, and mildew-resistant additives for protection in humid areas.
- Their consistent flat finish makes touch-ups seamless, ensuring a polished, long-lasting result.
Pro Tip: Have you ever tried to color-match ceiling paint? It can be quite frustrating. Eliminate this waste of time by using the same ceiling paint type consistently throughout your home. This way, you won’t have to worry about color-matching when you make changes down the line, like swapping out a light fixture.
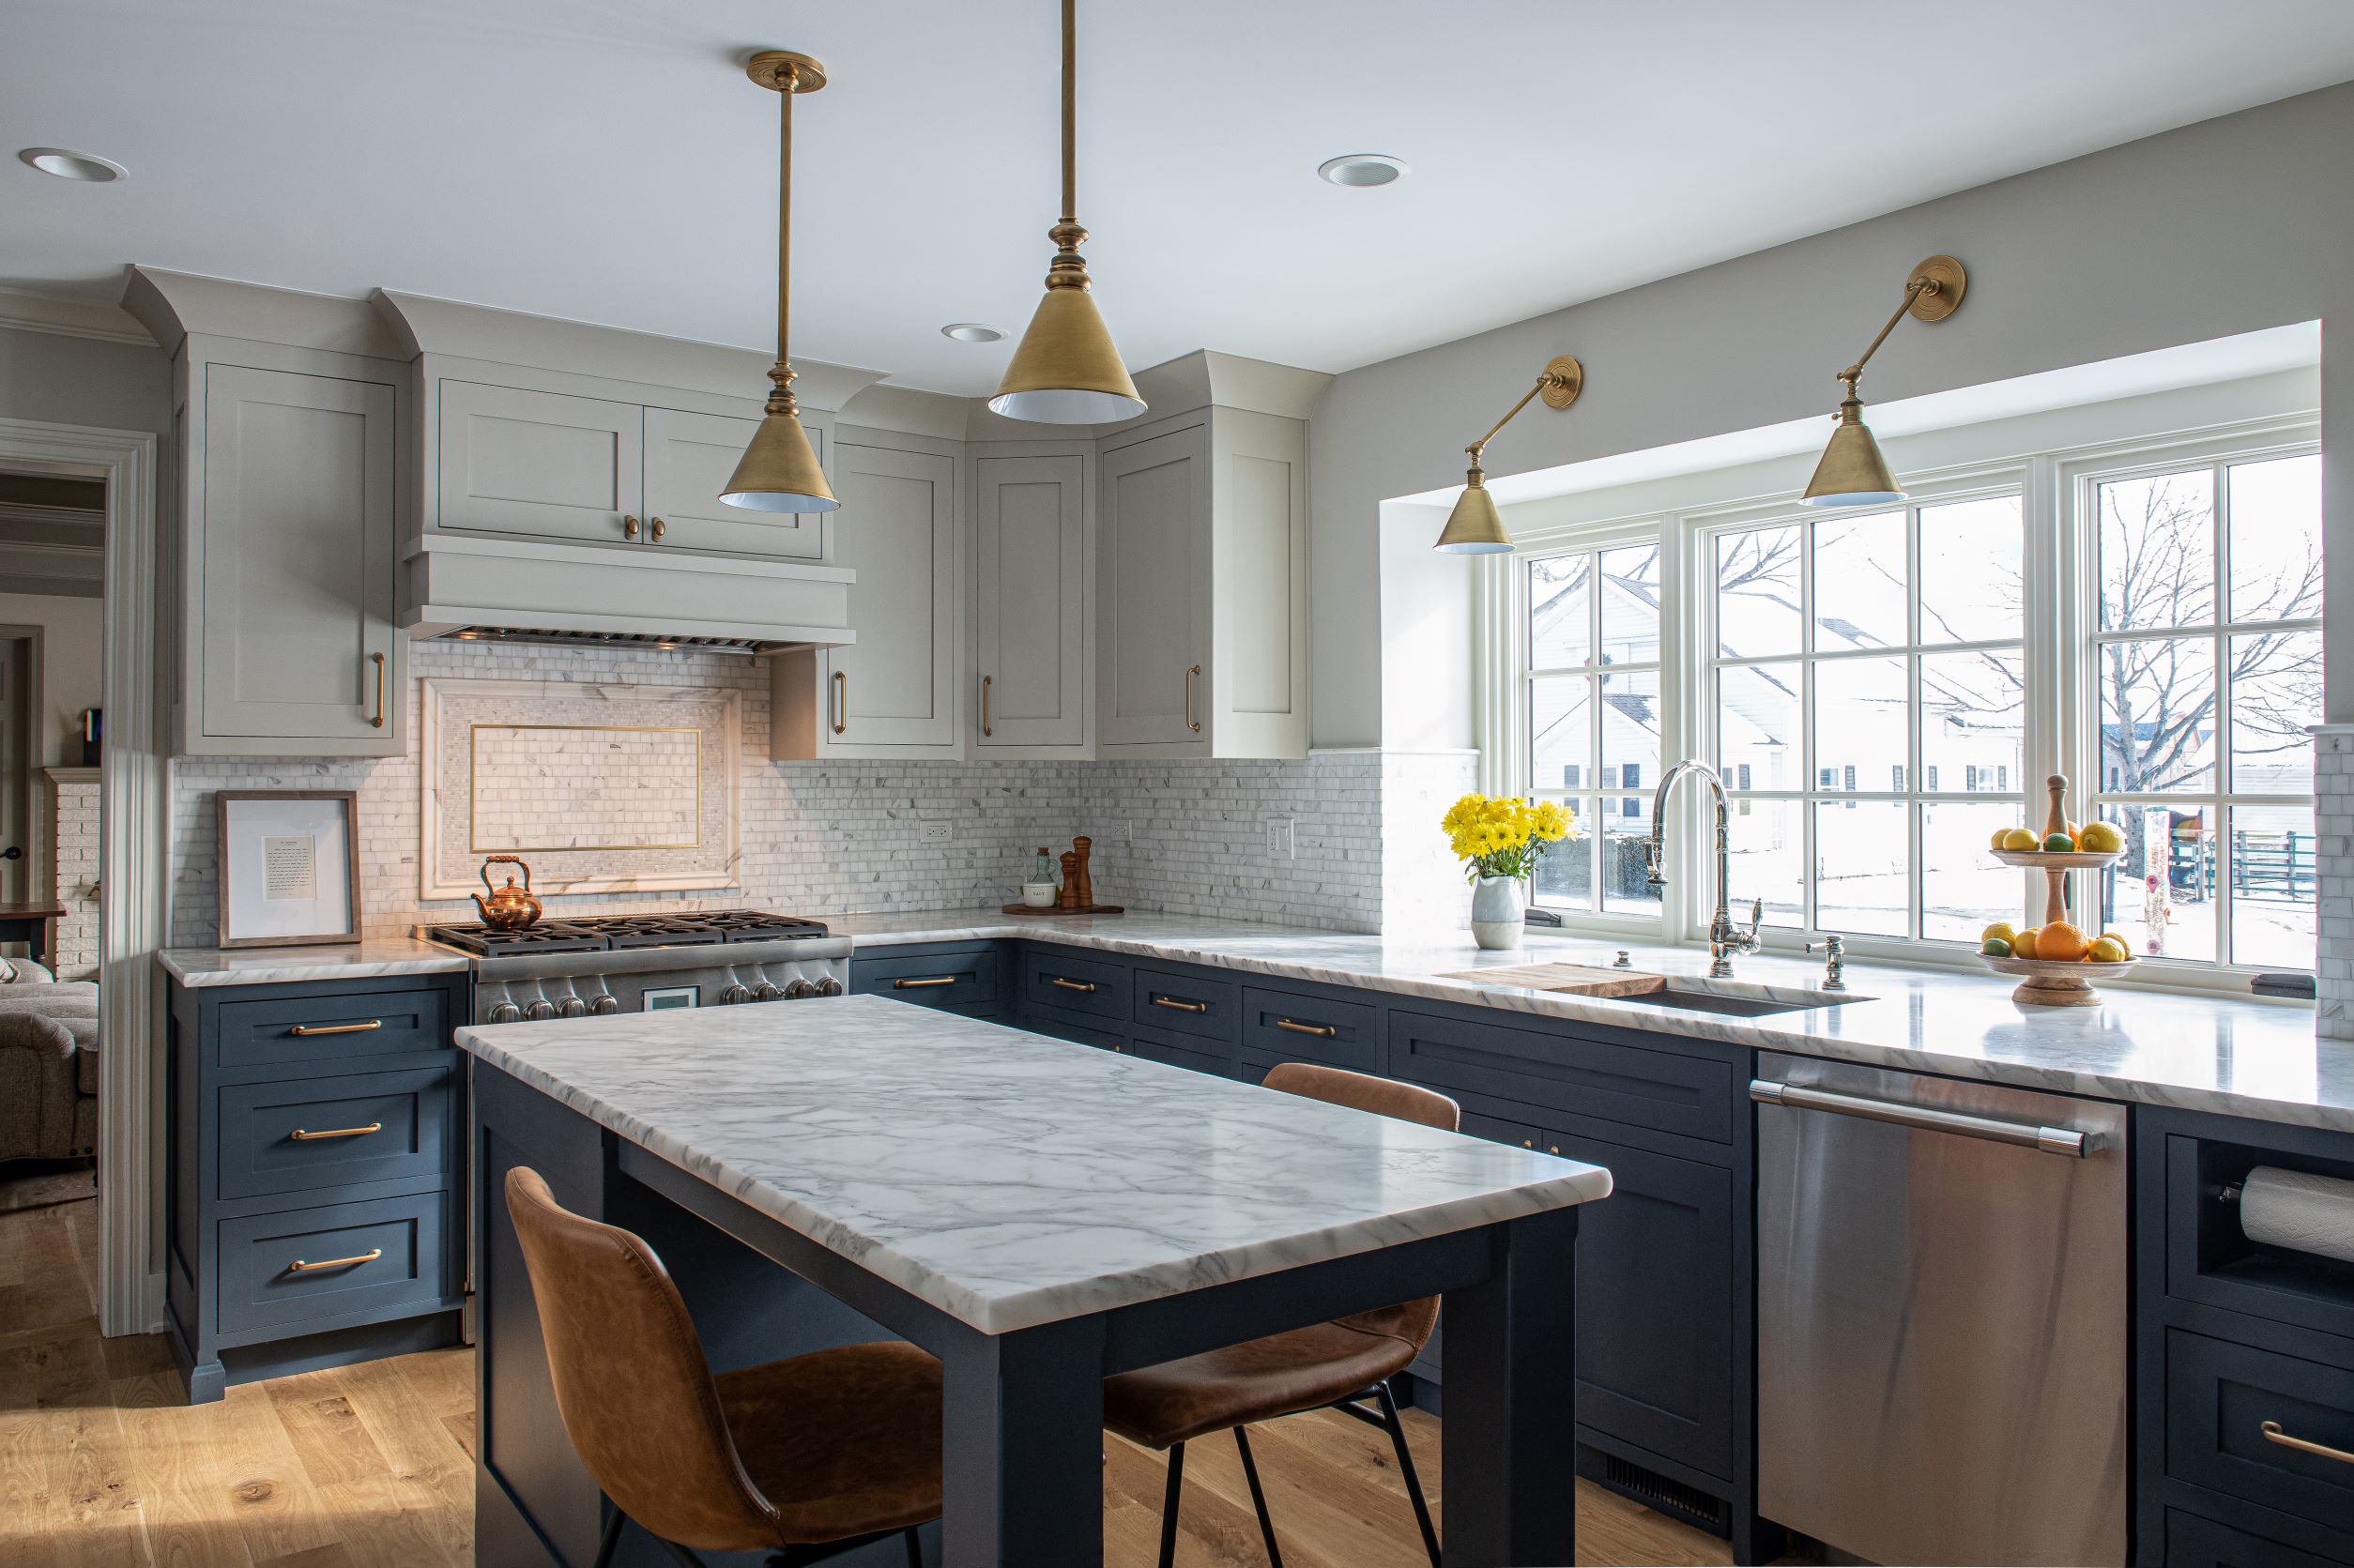
 The above Image features an accent wall painted in Pewter Green (SW 6208) by Sherwin-Williams.
Painting Tip #3: The Importance of Prep Work & Application
Achieving a high-quality, professional paint finish starts long before a paintbrush is applied. Proper preparation and application techniques can make or break the final result.
Taping & Mudding Drywall Seams
Painting a room after installing new drywall requires professional expertise. The drywall team tapes and muds the newly drywalled walls, followed by the painting team, who fills any indentations or imperfections with additional mud and sands them smooth before painting. If this step is rushed or done improperly, seams and uneven textures will remain visible, no matter how many coats of paint are applied. Thorough sanding between coats is crucial to achieving a smooth, even surface that blends with the surrounding wall.
Why It Matters: Without proper preparation of the walls, the paint will highlight flaws rather than hide them. Smooth walls are the key to achieving a high-quality outcome.
 The above Image features an accent wall painted in Pewter Green (SW 6208) by Sherwin-Williams.
Caulking Gaps & Trim
Caulk is vital for sealing gaps between walls, trim, baseboards, and crown molding. Over time, gaps naturally appear due to slight shifts in a home’s structure, especially in areas with frequent temperature and humidity changes. Applying a paintable, flexible caulk before painting ensures a smooth transition between surfaces and prevents unsightly cracks.
Why It Matters: Caulk creates clean, crisp lines where walls meet trim, eliminating shadows and gaps that can make a space look unfinished. It also helps prevent dust and moisture accumulation, which can lead to paint damage over time.

Covering Nail Holes, Dents, and Surface Imperfections
Even minor imperfections, such as nail holes, dings, and small cracks, can become very visible once paint is applied. Using spackle or lightweight joint compound, followed by light sanding, ensures these blemishes disappear.
Why It Matters: Paint settles into imperfections, making them more noticeable rather than concealing them. Proper patching and sanding ensure a uniform finish that looks smooth under all lighting conditions.
Pro Tip: Many assume that filling nail holes falls under the carpenter’s responsibilities, but it’s actually the painter’s job to handle this step before applying paint.

How to Paint a Room: Best Application Techniques
Spraying vs. Brushing
Trim and doors should be sprayed instead of brushed. Spraying ensures a smooth, uniform coating while painting with a brush can leave visible bristle strokes that affect the overall appearance and trap dust and debris over time, making cleaning and maintenance more challenging.
Many homeowners don’t realize that properly painting a door isn’t just about aesthetics—it’s required to maintain the manufacturer’s warranty. Most door warranties specify that the door must be properly sealed and painted to protect it from moisture, temperature changes, and warping. Failing to follow these guidelines can void the warranty, leaving you responsible for any damage that occurs.
To completely seal a door, you must remove the door from the hinges, remove all hardware, including the doorknob, and thoroughly paint all six sides of the door—the front, back, edges, top, and bottom.
%20(2).png?width=1600&height=800&name=paint-spray-stock%20(1600x800)%20(2).png)
Rolling Walls
Rolling is the recommended technique for painting walls, as it ensures uniform coverage and simplifies future touch-ups. Unlike spraying, which can be challenging to control, or brushing, which leaves visible brush strokes, a roller ensures a consistent, high-quality application with less effort. However, the quality of the roller and the nap (thickness of the roller cover) play a crucial role in achieving professional results.
The nap thickness of a roller determines how much paint it holds and how it interacts with different material textures:
-
3/16” - ¼” nap – Best for smooth surfaces
-
⅜” - ½” nap – Ideal for semi-smooth walls like interior walls, ceilings, and drywall
-
¾” nap or higher – Best for rough or heavily textured surfaces like wood, stucco, brick or masonry.
%20(2).png?width=1600&height=800&name=painting-with-roller-stock%20(1600x800)%20(2).png)
Prep & Application: Bottom Line
Skipping or rushing the preparation process leads to visible flaws, uneven textures, the use of more paint, and premature paint failure. Properly taping, mudding, sanding, and caulking before painting results in crisp lines, smooth surfaces, and a durable, long-lasting paint job that enhances a space's overall appearance and value.
Why invest time and money into painting if you're not committed to doing it right?

The Final Touch: Why Your Paint Job Matters More Than You May Think
While DIY painting may seem like a budget-friendly choice, many homeowners underestimate the skill, time, and effort required for a flawless finish. A professional paint job goes beyond adding color—it’s about precision, durability, and elevating your home’s overall aesthetic.
As the final touch in any renovation, painting can either enhance a beautifully designed space or diminish its impact if done poorly. Uneven application, visible brush strokes, and inadequate prep work can leave a room looking unfinished, regardless of the quality of materials beneath. Professional painters understand how different surfaces absorb paint and apply the proper techniques to ensure smooth, even coverage that lasts.
By investing in expert craftsmanship, you not only achieve a polished, high-quality result but also protect your home’s value and minimize the need for future touch-ups or repaints. A professional paint job isn’t just about looks—it’s a long-term investment in your home’s beauty and longevity.
Start planning your home renovation with "The Ultimate Step-by-Step Home Renovation Transformation Guide." Discover expert tips to keep your project on track, saving you time and money!


![How to Design an Open Floor Plan for Entertaining: Key Considerations [+Tips]](https://www.patrickafinn.com/hubfs/images/portfolio/Transitional%20First%20Floor%20Renovation/Arlington-heights-open-floor-concept-1.jpeg)